One of the things I learned shortly after we adopted our cat Kensington is that he doesn’t care too much about my sleeping habits, if he’s hungry he’ll happily let us know. I don’t have kids and having to wake up in the early hours of the morning to feed a hungry cat was a troubling proposition so I thought I'd find a better way. After some thought, I decided we needed a automated pet feeder but I wasn’t able to find a commercially available one that met my criteria so I had to make my own which ended up being a really fun project.
My pet feeder had the following requirements:
- It had to be internet enabled
- It needed Wi-Fi connectivity so it could be more portable
- It needed to be small and not an eyesore
- It needed to support scheduling as well as manual operation
I found a few ideas online (it seems my situation isn’t unique!) but yet again none of them met my criteria. After a lot of thought, I settled on a design that I thought would be functional and give me the flexibility that I was looking for and off I went to Home Depot to get the material. I ended up with a few lengths of PVC piping of varying sizes and a polycarbonate sheet. For the electronic brain of the feeder I used the following:
- 1 x Spark Core (Wi-Fi development board)
- 1 x Continuous Rotation Servo
- 1 x Green LED (Feed indicator)
- 1 x Red LED (Power indicator)
- 1 x Glue stick (to create a cheap linear actuator)
- 2 x resistors, some leads and a mini breadboard
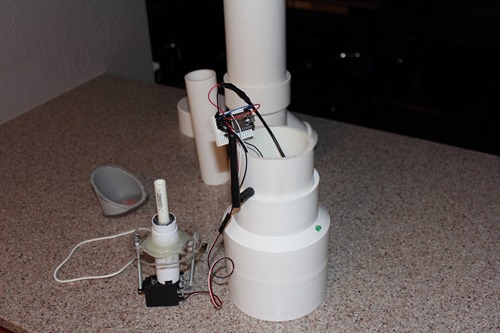
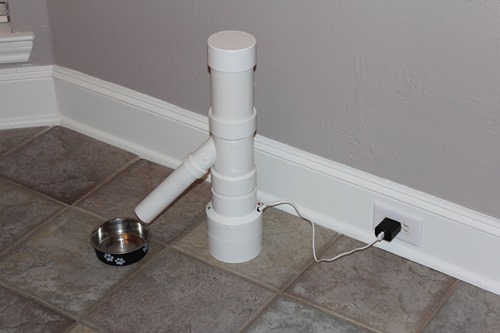
The idea is that cat food is deposited in the top part of the feeder, the Spark Core drives the actuator which lowers and then raises a platform inside the main pipe chamber. Lowering the actuator exposes the opening ‘elbow’ in the middle section of the feeder and the food then falls down the smaller section of pipe and is deposited in the bowl. I wanted to ensure that only 1-2 cups of food is dispensed and was able to do this by tweaking how wide of an opening is created when the actuator is lowered and how long it is kept open for. To remove any guessing, I added some LEDs to show me what was happening at all times. The red LED is always lit when the feeder is powered on and the green LED only lights up during a feed operation. I played around with various designs for the platform that moves up and down inside the main chamber and ended up creating an angular platform. Here are some pictures of the feeder:
Operating the feeder is done by interacting with the Spark Core via the Spark API. Before this can be done, the board first has to have the relevant operating instructions flashed to it and I put together the following to achieve this:
[shell]
Servo myServo; // create servo object to control a servo
int redLed = D0; // red power LED on pin D0
int greenLed = D1; //green feed LED on pin D1
void setup()
{
myServo.attach(A0); // attaches the servo on the pin A0
Spark.function("feed", feedKenny); // register the function
pinMode(redLed, OUTPUT);
pinMode(greenLed, OUTPUT);
}
void loop()
{
digitalWrite(redLed, HIGH); // red LED always on
}
int feedKenny(String command) //called upon a matching POST request
{
digitalWrite(greenLed, HIGH); // turn on green LED when feeding
myServo.writeMicroseconds(1000);
delay(7500);
myServo.writeMicroseconds(1500);
delay(2500);
myServo.writeMicroseconds(2000);
delay(7500);
myServo.writeMicroseconds(1500);
digitalWrite(greenLed, LOW); // turn off green LED
return 200;
}
[/shell]
Once the Spark Core is connected to the Wi-Fi network and the application code has been flashed you can interact with it using a regular HTTP POST. For testing, you can use PowerShell and Invoke-RestMethod to do this:
[ps]
Invoke-RestMethod -Uri 'https://api.spark.io/v1/devices/YOUR-DEVICE-ID/FUNCTION?access_token=YOUR-TOKEN' -Method Post
[/ps]
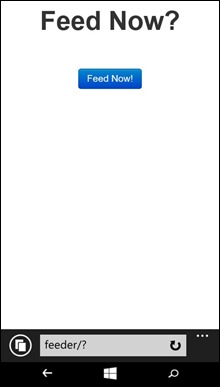
PowerShell is great for testing, but not very practical for daily use, fortunately this is easily remedied with a few lines for HTML code. I created a very simple form and put it on web server on my home network. This page is not secured and is only accessible when I’m on my home network.
Scheduling regular feeding times is really easy with Azure Scheduler. Sign in to your Azure subscription and click ‘Scheduler’
Create a new Job Collection and give it a meaningful name
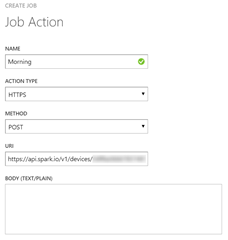
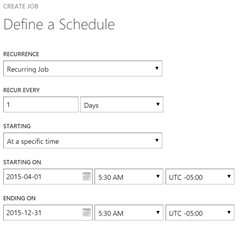
The wizard will also give you the option of creating your first Job. Since the Spark API requires a HTTPS POST, be sure to select that option and schedule it accordingly
Once the wizard completes, you can add more Jobs to the Job Collection as appropriate:
Here is a quick demonstration of how the feeder works:
[embed]https://www.youtube.com/watch?v=O226R01mmD0[/embed]
